

 In this installment in our series of coin anatomy, we will discuss Alloy and Strike.
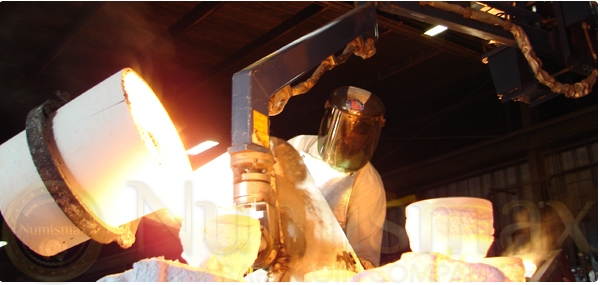
A coin starts its life in a vat of molten metal. Since gold and silver in particular are very soft metals, and wouldn’t last long in circulation in their pure form, other metals are added to strengthen the mixture. This mixture is called an alloy, and the relative percentages of each different series can be found in your Red Book. When you look there, however, you notice that the actual amount of gold or silver are seemingly obscure amounts. So how did the Treasury come up with the actual percentages of the ingredients in each alloy? The answer has to do with face value and diameter. Coins have different diameters so that one denomination will not be confused with another denomination. This made it easier for merchants and bank tellers to quickly tell if there was a silver dollar in a stack of $20 gold pieces, or a nickel mixed in with the $5 pieces. The Treasury decided to make the silver dollar a larger diameter than the $20 gold piece. Gold and silver values were very consistent at the time, so the amount of the precious metal in each was equal to the face value. However, the amount of silver in a silver dollar is roughly 77%, and the gold in a $20 gold piece is roughly 96%. The rest is made up of copper. (Metal contents in different coins has changed over the years, and your Red Book will tell you the rest of that story.) So back to the vat. The metals are mixed thoroughly (in theory! It’s not hard to find copper spots from improper mixing on gold pieces), then poured out into sheets of the thickness of the denomination being made. After cooling, discs are stamped from the sheets, they are rolled through another tool to make a consistent edge, and a planchet is born. The planchet (effectively an unstruck coin) then takes one of two paths regarding alloy and strike.
OLYMPUS DIGITAL CAMERA
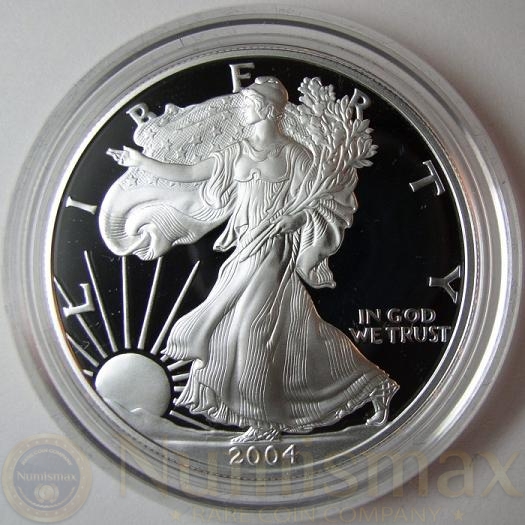
Proof Strike Coins. When the mint installs a new die into the press, they need to test it to see the quality of the image produced. A mint employee will take a planchet either with a gloved hand or soft tongs, and gently place the planchet on the die. Under the immense pressure of the press, the planchet would essentially squish out of the sides of the die, but a collar is in place to prevent this and shape the edge at the same time. The planchet is struck at least twice, removed from the die with the same gloved hand or tongs that placed it there, then carefully set aside for inspection. This process creates “proof” of the image of the die, therefore we call these specimens proof coins. These coins are not put into circulation in spite of technically being legal tender, however they are easy to acquire each year from the mint in “proof sets.”
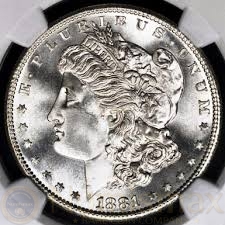 Business Strike Coins. Once a die has been approved, it is ready to create coins for circulation. In this method of manufacture, the planchets make their way down a slide or conveyor onto the die, are struck one time, and then make their way into some sort of bin where they are rolled or bagged. When the planchet is struck, it squishes out into the collar. When it does this, the metal forms microscopic striations radiating from the center outwards similar to the spokes of a wheel. These striations reflect light in a way that creates a frosty appearance. This is called luster, and is the hallmark of an uncirculated coin. Luster is extremely delicate, and rubs off easily in circulation. Given this, a good numismatist looks for luster as the first thing in determining the grade of a coin.
Since a proof coin is struck at least twice, shouldn’t it have twice the luster of a business strike? Actually, no. The second strike flattens out the luster to such a degree, that a mirror like surface is formed. A proof coin will be completely devoid of luster, and will have such a reflective quality that you will easily be able to see your reflection in the fields.
Thank you for reading this installment on Alloy and Strike. In the next installment, we will look at the surface of the coin, and talk about the different Marks that are seen there.